
With the release of Fortune and Glory on the horizon, we’re excited for you to get your hands on the set and start your painting journey.
For those looking to helm the Sultanate half of the Fortune and Glory Two Player Starter Set, Daz has returned with a Step-by-Step to show you how he paints his Sultanate units from the set, using his Muharib Class Skyship as an example.
Whether you’re looking for inspiration or want to paint your starter set exactly how Daz has, follow along and get your Sultanate fleet looking shipshape. Don’t worry Union players, we also have a Step-by-Step for the Union half here!
All paint is P3 unless stated otherwise.
The Hull
Step 1 - To begin, I undercoated the miniature in three sub-assemblies to make the painting process easier. To ensure I didn't overcrowd my painting handle during the painting process, I tacked the sub-assemblies on two separate painting handles.
Although the Sultanate has quite a bright finish to its colour scheme, I'm going in with an undercoat of black to add depth to the miniatures. Any of your favourite matte black paints will work.
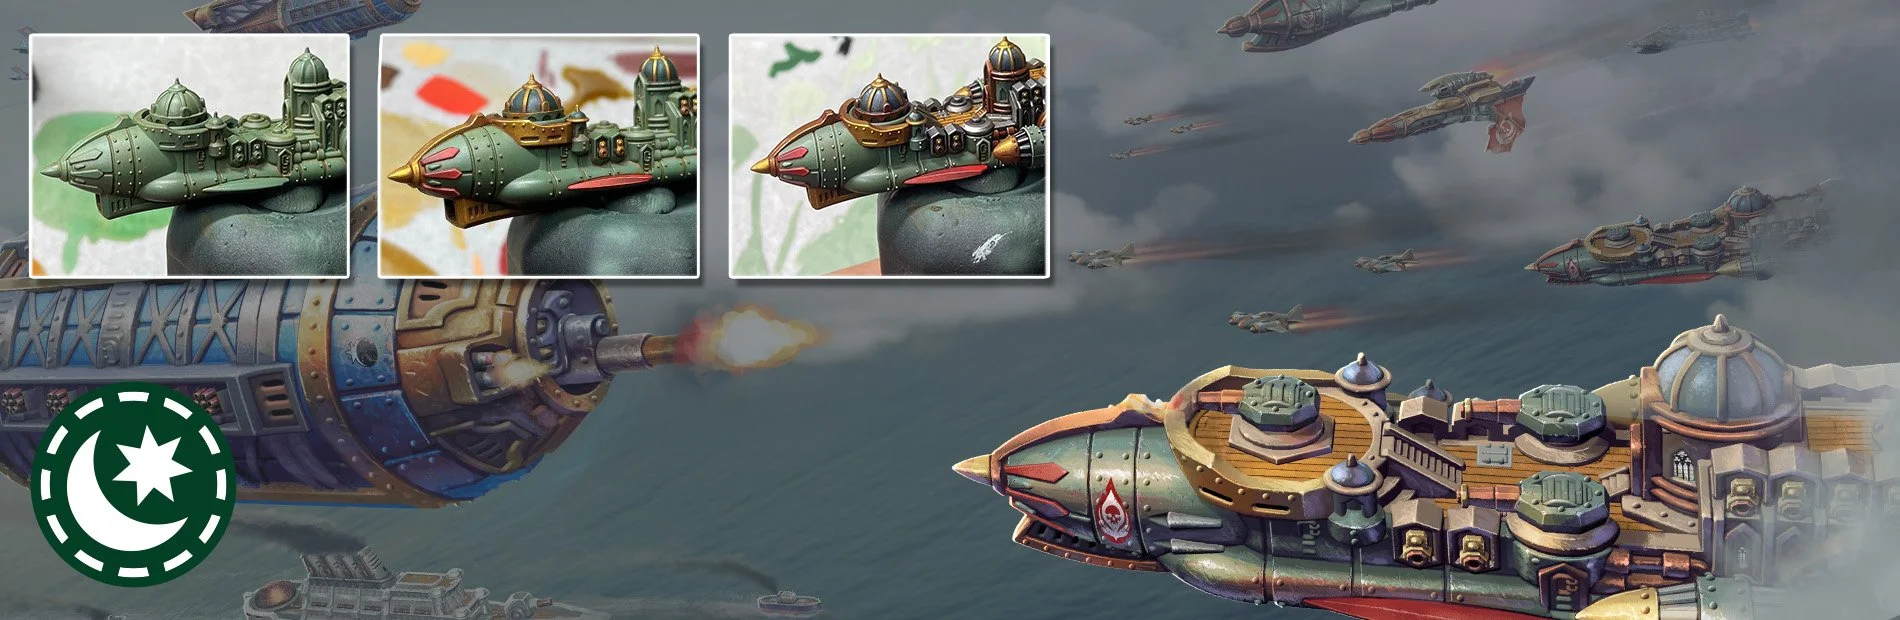
Step 2 - Using an airbrush, I began to base coat the miniature with Gnarls Green, allowing the vibrancy to fade out towards the underside of the miniature to force there to be a shadowed area below.
To get a solid base, I repeated the above process three times. I then removed the miniatures from the handles and applied a layer of 50/50 Gnarls Green/Thamar Black to the underside to cover up any gaps left by the Blu Tac.
Step 3 - I applied the first highlight with Mage Hunter Green. This is a majority highlight, covering most of the miniature but leaving the previous coat in the recesses and underside to help the shading process later on.
Step 4 - Using a 50/50 mix of Mage Hunter Green/Menoth White Highlight, I applied the second highlight. This was airbrushed from above the model to achieve maximum contrast between the top decks of the ship and the shadowed underside.
I use Menoth White Highlight rather than pure white here as it contains a decent amount of yellow, which will add luminosity to the Mage Hunter Green rather than desaturating it. After this step, I applied a generous coat of Vallejo Gloss Acrylic Varnish (26.517), ready for the next stage.
Step 5 - Finally, the entire miniature was given a glaze of Bloodstone (5/1 water/paint) to wrap up the first stage. Due to this colour having quite a prominent orange finish, it ties in well with our previous highlight to add warmth whilst also providing some very basic grime or rust.
The Decking
Step 6 - To start with the decking, a base coat of Bogrin Brown was applied. When applying this base coat, I tried to be as neat as possible so as not to get any brown paint on the green areas. If you do get any paint on any other area, don't worry too much as we'll be painting over them later.
Step 7 - Adding Rucksack Tan to Bogrin Brown (50/50), the first decking highlight was applied. You won’t notice too much of a difference right now, but it will help with the definition of the planks later.
Step 8 - Next, I added Menoth White Base to the previous mix in a 50/50 ratio and applied this as the final highlight. This was placed towards the stern end of each plank and then blended out towards the bow.
Step 9 - To finish with the decking, I applied a mix of Caspian Flesh Wash and a spot of Yellow Ink to the entire decking area to add separation to the planks.
Gold Details
Step 10 - Every Sultanate ship needs elegant gold detailing! To start, the golden areas were given a basecoat of 75/25 Brass Balls/Bloodstone. Due to the nature of metallics being fairly thin, I applied this in two coats.
Step 11 - Creating a mix of 90/10 Caspian Flesh Wash/Brown Ink, I watered it down with equal parts water and applied it as a wash. If you're using P3 Brown Ink, be very sparing as it is highly pigmented and will make your miniature too red if used heavily-handedly.
Step 12 - At this point, I painted the internal areas of the domes with Exile Blue. This will help keep lines clear across the areas.
Step 13 - Using Solid Gold, I began highlighting the previously painted golden parts. I positioned the highlights with the light source coming from the front of the miniature. Once again, due to the nature of metallics, I applied this in two stippled layers to add depth.
Step 14 - To unite the previous stages, I applied a thin layer of Caspian Flesh Wash as a glaze, ensuring that it did not pool in any way.
Step 15 - A final edge highlight to the golden areas was applied, using a 50/50 mix of Solid Gold/Radiant Platinum.
Red Details
Stage 16 - I began by base coating the red areas with a mix of 50/50 Amethyst Rose/Bloodstone
Stage 17 - Next, I used Skorne Red to apply a majority highlight, leaving the darker base coat in the recessed areas.
Stage 18 - Then, Khador Red Base was used for the next highlight.
Stage 19 - In order to shade the different planes of the panels, I used a very thin glaze of Blue Ink. This was blended away from the highlights right up to where the final highlight will go to achieve maximum contrast. I repeated this stage three times.
Stage 20 - From here, a mix of 50/50 Khador Red/Moldy Ochre was used for the first edge highlight.
Stage 21 - Finally, I used pure Moldy Ochre for the last edge highlight on the red details.
Silver Details
Step 22 - To begin base coating the silver parts of the miniature, I used Pig Iron.
Step 23 - Next, I used a 50/50 wash of Blue/Brown Ink to shade the previous silver areas.
Step 24 - The final highlight of the silver areas was applied using Cold Steel.
Bronze Details
Step 25 - Creating a mix of 75/25 Molten Bronze/Bloodstone, I applied a base coat to the bronze areas
Step 26 - To shade the bronze areas, I watered down some Brown Ink (25/75 Ink/Water)..
Step 27 - I used Exile Blue, watered down 75% to glaze the bronze. This brings in some nice toning to the shadowed areas.
Step 28 - To start the highlighting process, I used pure Molten Bronze.
Step 29 - Then, I added Cold Steel to the Molten Bronze from before for the second highlight.
Step 30 - Next, I used a glaze of Brown Ink to tie all the previous stages together.
Step 31 - A final edge highlight of Cold Steel was applied to finish the bronze areas.
Green Armour
Step 32 - At this point, I worked my way around the model, tidying up the green areas with Mage Hunter Green. I also applied this as a first rough highlight to pick out any details ready for the next step.
Step 33 - After touching up, I used a 50/50 mix of Mage Hunter Green/Menoth White Base for the first proper edge highlight on the green armour
Step 34 - Concentrating on the underside and recesses on the ship, I used a glaze of Exile Blue.
Step 35 - In order to force the volumes of the hull to pop, I used a glaze of a 50/50 mix of Gnarls Green/Exile Blue.
Step 36 - Finally, the finishing edge highlight was applied to the hull using Sickly Skin.
Following these steps, you can also have a great-looking Sultanate fleet ready to take on the Union on the tabletop. You can pick up your own Sultanate and Union mercenary fleets as part of the new Dystopian Wars Two Player Starter Set, Fortune and Glory.


Make sure to keep an eye out for news on the latest releases on the Warcradle blog and follow us on Facebook, Twitter and Instagram to stay up to date with any news or future Step-by-Steps.