
With the recent announcement of a new nation for Dystopian Wars, The Japanese, we just cannot contain our excitement!
It seems the same can be said for Daz as he is back with another step-by-step, this time focusing on a brand new cruiser from the Kongo Battlefleet Set - The Hokkaido Cruiser.
Keep reading and follow along to find out just how Daz achieved the look of his Hokkaido Cruiser.
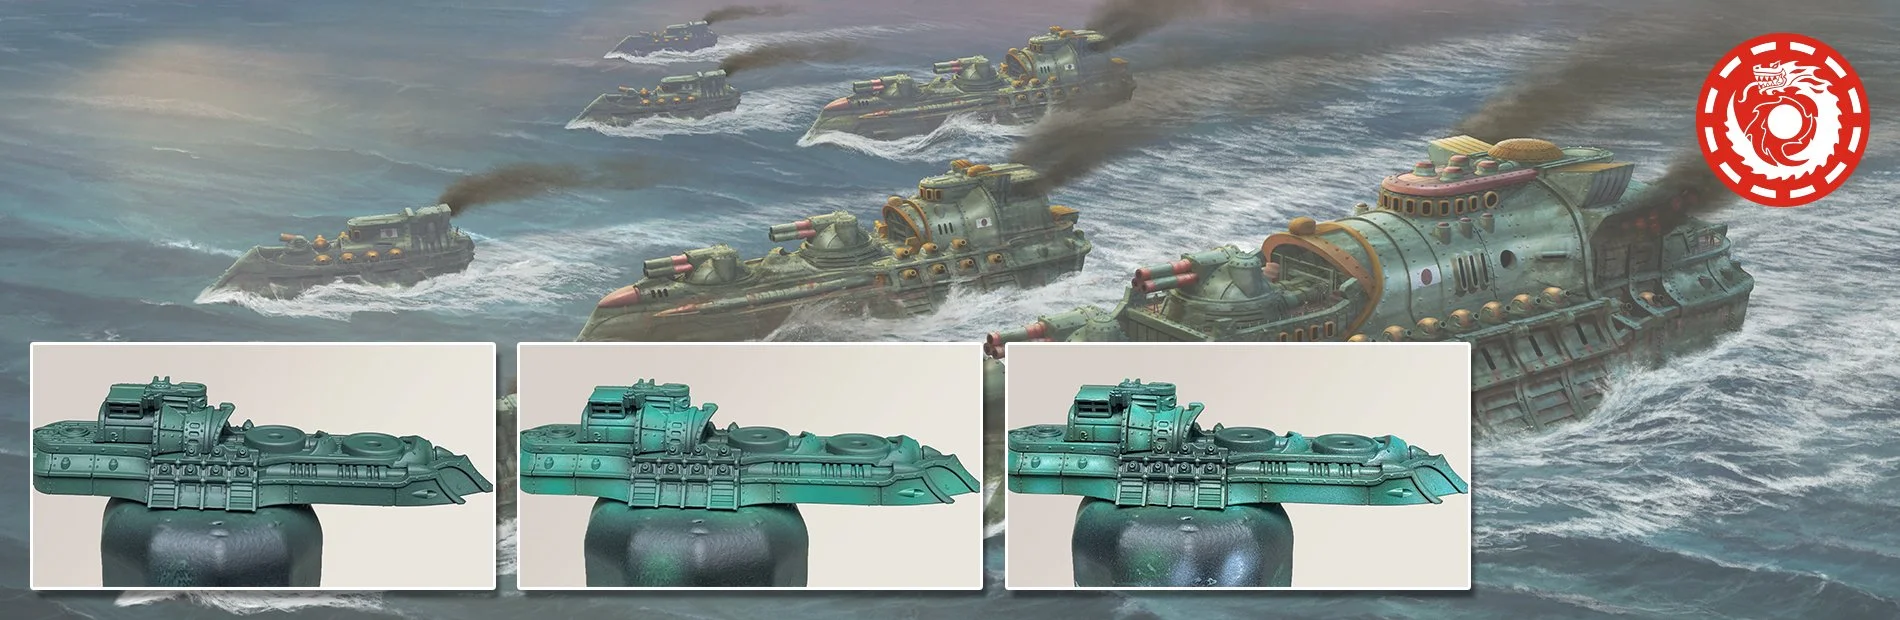
Step 1 - To start I primed the model with GW Chaos Black, then applied three thin layers of Gnarls Green using an airbrush, leaving a little of the undercoat in the deepest recesses.
Step 2 - Next, I added Losan Green to the GW Chaos Black until I had a 50/50 mix and then applied this as a first highlight, covering around 75% of the model.
Step 3 - Then I added Meridius Blue until I had around a 50% mix with the previous colour mix. I applied this to the centre of any open areas of the hull from above.
Step 4 - I then added Frostbite to the previous colour mix in a 50/50 ratio and applied this sparingly to boost the final volumes of the hull plates.
Step 5 - After a coat of gloss varnish I applied a wash of 50/50 Sepia and Turquoise Ink, watered down around 50%. I applied this quite heavily and then removed the excess with a dry brush.
Step 6 - Next, I used a small piece of torn up sponge to apply weathering with Umbral Umber.
Step 7 - This next stage is by far the most time consuming, but stick with it as the results will bring the miniature to life. Using a slightly watered down Frostbite I applied a fine edge highlight to every part of the hull, then underlined all the chips and scratches I’d previously applied.
Step 8 - Next up I used a mix of 50/50 Umbral Umber and Rhulic Gold to base coat all the golden metalwork. As a tip, I find that adding a standard paint to a metallic one allows for better coverage, especially with golds.
Step 9 - After this base coat I added Meaty Ochre to the previous mix at around a 50/50 ratio and highlighted the upper faces and edges of the gold.
Step 10 - Then, I added 50/50 Cold Steel to the previous mix and applied a final edge highlight to the gold detailing.
Step 11 - To tie the gold together and provide a little lining to separate it from the green I applied a wash of 50/50 Vallejo Red and Violet ink, watered down around 70%.
Step 12 - Next up is the decking. I gave it a base coat of Bloodstone.
Step 13 - I then highlighted the decking with a 50/50 mix of Bloodstone and Meaty Ochre.
Step 14 - The final decking highlights were then applied using Meaty Ochre.
Step 15 - After this final decking highlight I applied a wash of Vallejo Sepia Ink watered down around 50/50 to the decking.
Step 16 - Next, I applied a base coat of Pig Iron to all the steel areas on the cruiser.
Step 17 - The steel areas were then given a wash using P3 Armour Wash.
Step 18 - I then applied a dark red base coat to the areas seen using 50/50 Sanguine Base and Skorne Red.
Step 19 - The red areas were then highlighted with a mix of 50/50 Sanguine Highlight and Skorne Red.
Step 20 - To finish, I added Mouldy Ochre to the previous mix at around 25/75 and applied the final highlights to the red and we’re done!
And there it is, the Hokkaido Cruiser from the new Kongo Battlefleet Set. What an amazing debut for The Japanese as they set out to join The Empire in Dystopian Wars.
Like the look of the Hokkaido Cruiser? Make sure to check out the Kongo Heavy Battleship and it’s supporting vessels like the Hokkaido Cruiser in the brand new Kongo Battlefleet Set, available to pre-order now at your FLGS or at Wayland Games online.

