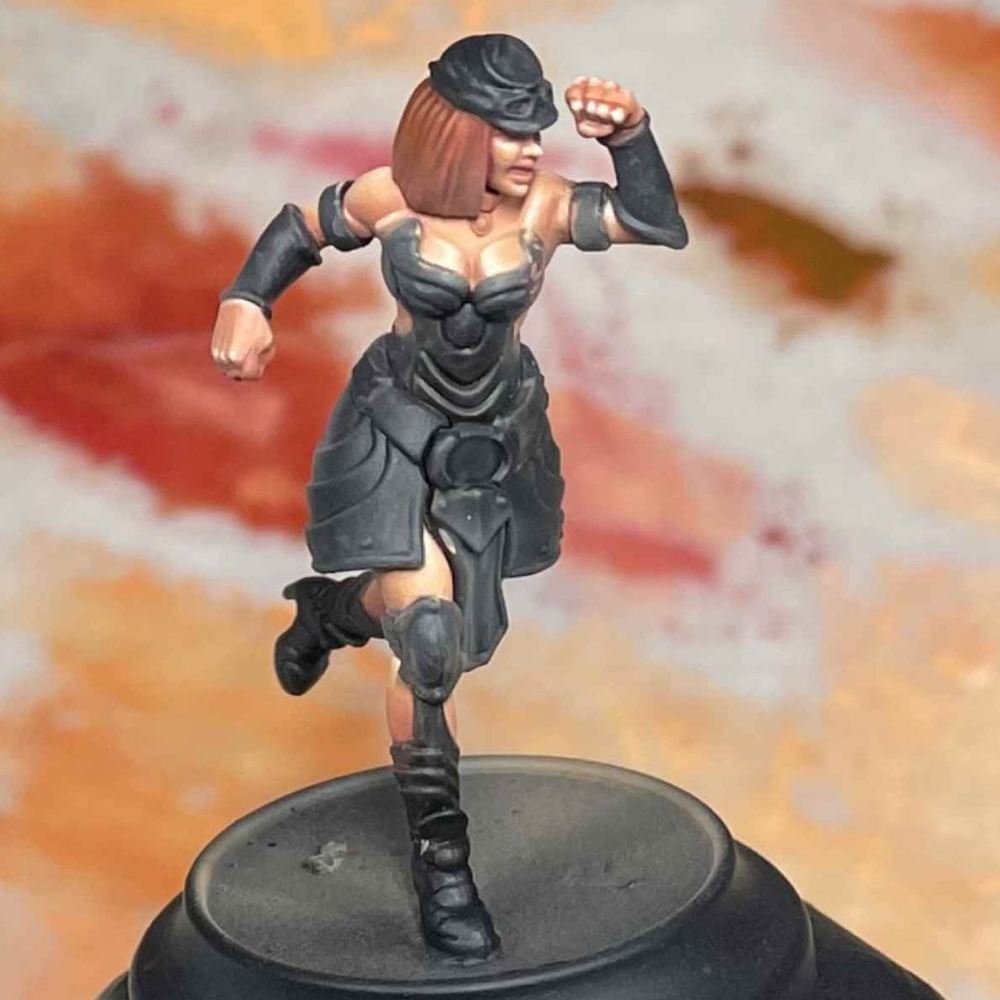
Daz has been engrossed in getting his Showdown at Retribution Two Player Starter Set for Wild West Exodus painted.
Today we are focusing on the armoured lady, Union Belle. Fighting alongside the hero of the Union, Union Belle stands firm with Nikolai Tesla in his battle against the Enlightened.
Want to achieve a muscle defined and highlighted skin tone for your Union Belle? Then follow Daz’ instructions below.
Step 1 - The skin areas were given a base coat of 50/50 Bogrin Brown/Midlund Flesh. I applied this in three thin layers with an airbrush to save time.
This will give us a pale skin tone that still includes a generous amount of orange/red to suggest that although she may be pale skinned, she's certainly spent a lot of time outdoors.
Step 2 - I applied a wash of Vallejo Flesh Wash mixed to 50/50 with my previous mix, then watered this down around 60%. Applying this sparingly, I made sure to wipe off the excess with a damp brush and guided the pigment into the recesses.
Step 3 - I added a little more Flesh wash to the mix, and then panel lined the deepest recesses and outlines of the model. This will be the deepest shade colour we'll use so keep your mix to fix mistakes or add further definition later on.
Step 4 - I blacked out any non-flesh areas with a watered down mix of Thamar Black. This step is completely unnecessary, but I find that it really helps me concentrate!
Step 5 - To add a little more vibrancy to the skin I applied a very fine glaze of P3 Murderous Magenta to any "softer" areas of the skin. This may seem a little oversaturated right now, but it will bring a natural vibrancy to the tone as we build our highlights over the top.
Step 6 - I went back to the original skin tone from step 1, and reapplied this to the majority of the skin, especially the areas facing forward and up as these would catch more light.
My mix was watered down to a slightly thick glaze, around 30/70 and I pushed the pigment to where I wanted the highlight to be the most focused. I then repeated this process twice.
Step 7 - I added a little P3 Jack Bone to the previous mix, and repeated the highlighting process over the previous areas, moving the highlight further towards the highest point. Be warned it will still look a little "sketchy" at this stage which is totally fine!
Step 8 - I added a little more Jack Bone so we're now at around a 50/50 mix for the next highlight. Once again I'm moving the highlight closer to the highest points.
Step 9 - I applied a very thin glaze of Murderous Magenta to the lower parts and undersides of the skin areas to bring back some warmth lost with the addition of Jack Bone in the highlights.
Step 10 - I added P3 Menoth White Highlight to the previous mix plus a little water to thin it to a thickish glaze again. I then highlighted the highest areas of the skin as well as a thin outline around each muscle. This will play off nicely against our panel lining from earlier, giving us high levels of contrast.
Step 11: To unify our previous stages I applied a very fine glaze of our base coat from Step 1 to all areas of the skin.
Step 12 - To finish I applied a highlight of pure Menoth White Highlight watered down around 70/30 to the upper areas and muscle edges.
And we're done!
Unless you want to push it a little further...
Step 13: Using an airbrush I blended the skintones using an incredibly fine (10/90) glaze of the basecoat from Step 1. I used a 0.15 needle and set my pressure to 2.
Don't rush and keep your trigger motions very small and light!
Step 14: I reapplied the final highlights with pure Menoth White Highlight watered down around 70/30.
Interested in Union Belle and Wild West Exodus? Then get started with the Showdown at Retribution Two Player Starter Set, available at FLGS as well as Wayland Games now.
Containing dozens of fantastically detailed Warcradle miniatures, the full third edition rulebook, quick start guide to help you get going straight away and much more.


