
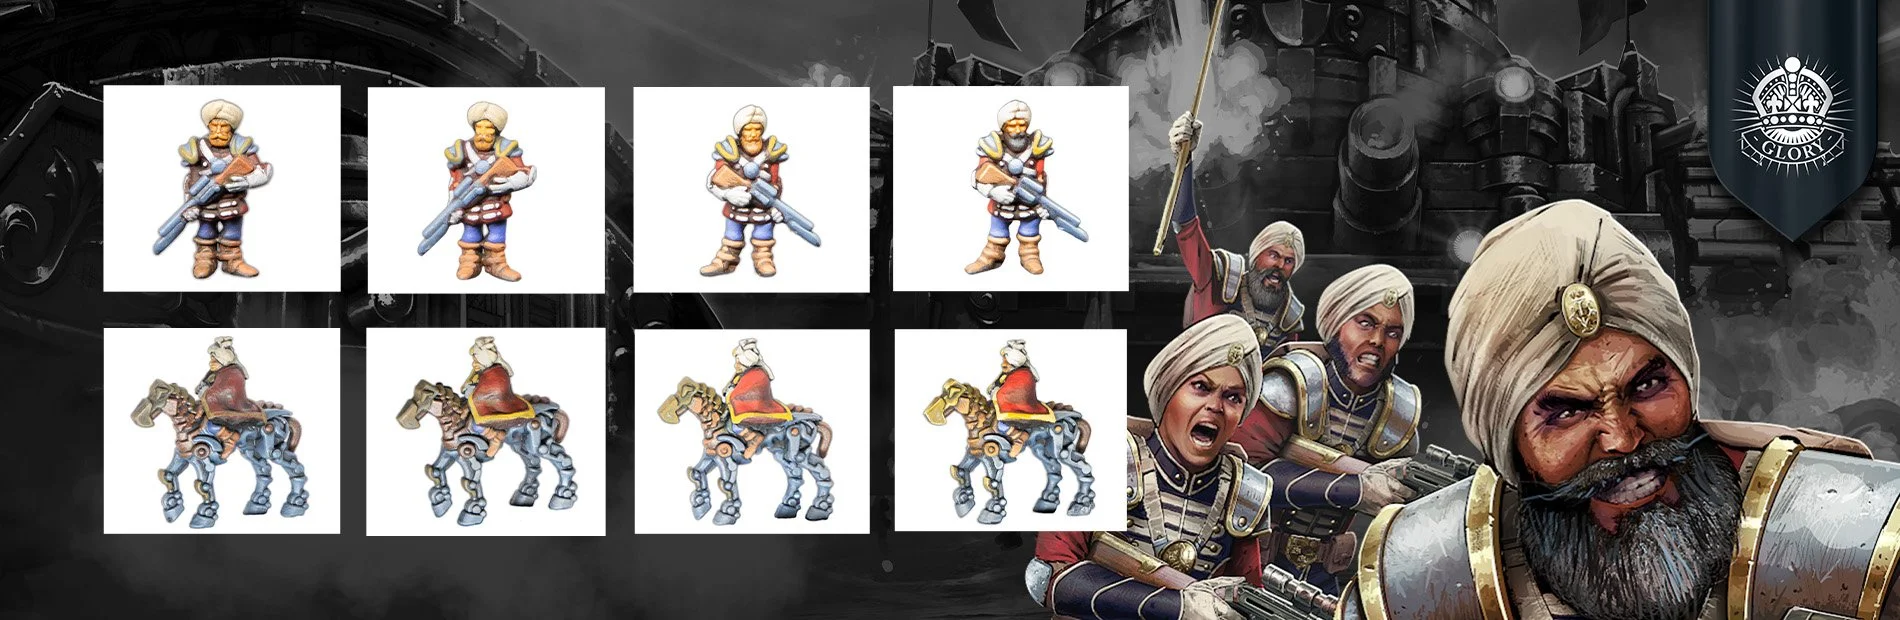
Whether you’re an avid player of Armoured Clash or a fresh face to the Dystopian Age, this blog serves as a painting guide to show you how to paint your free sprue from Wargames Illustrated to both a tabletop-ready (Step 3) and studio paint job level. With your painting supplies at hand, we’ll show you how to make the most of the incredibly detailed miniatures found on the front of the magazine by following along with Daz, our incredible Studio painter.
You can pick up your own copy of the Crown Indian Raj sprue with issue 464 of Wargames Illustrated.
Warhammer Colour:
Chaos Black Spray
Vallejo Paints:
Gory Red
Ultramarine Blue
Grunge Brown
Stonewall Grey
Parasite Brown
Khaki
Sombre Grey
Golden Yellow
Charred Brown
Hull Red
Blue Ink
Bloody Red
Pale Blue
Sunset Orange
Deck Tan
Skin Wash
Black
Step 1
The first step of painting up the Commander and Infantry miniatures was an initial undercoat of Chaos Black Spray.
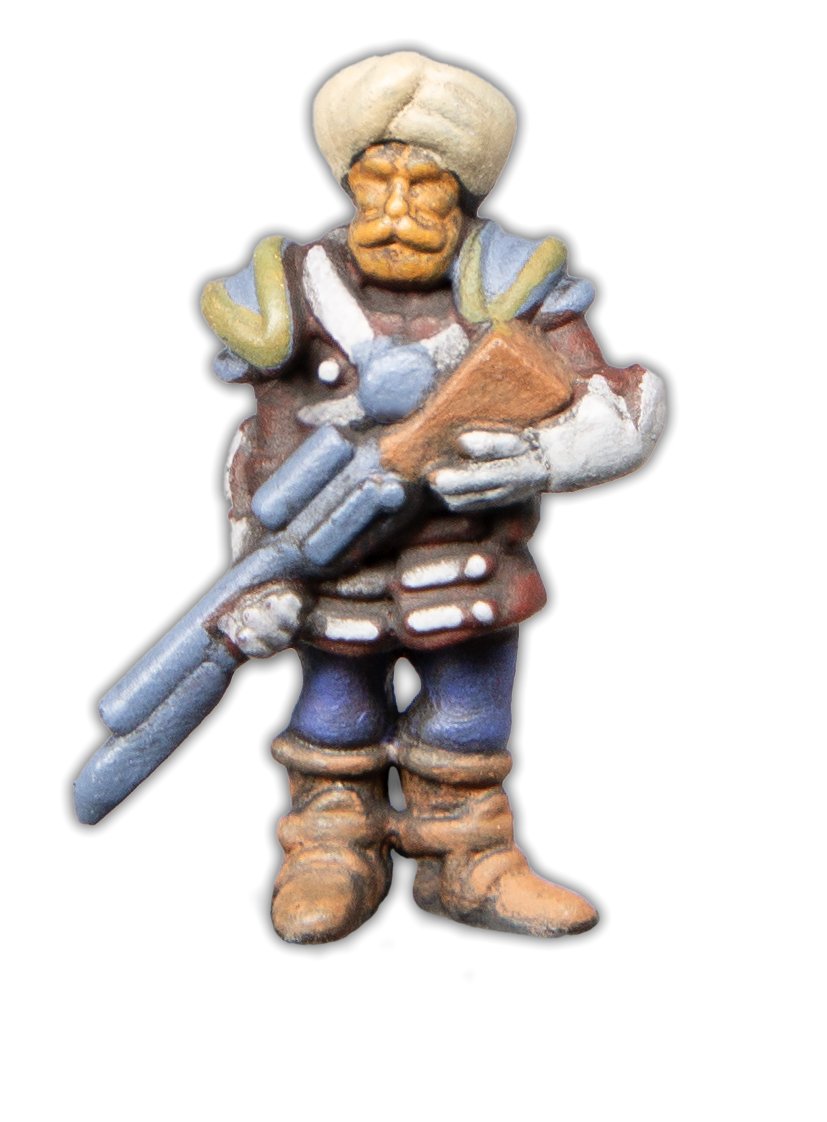
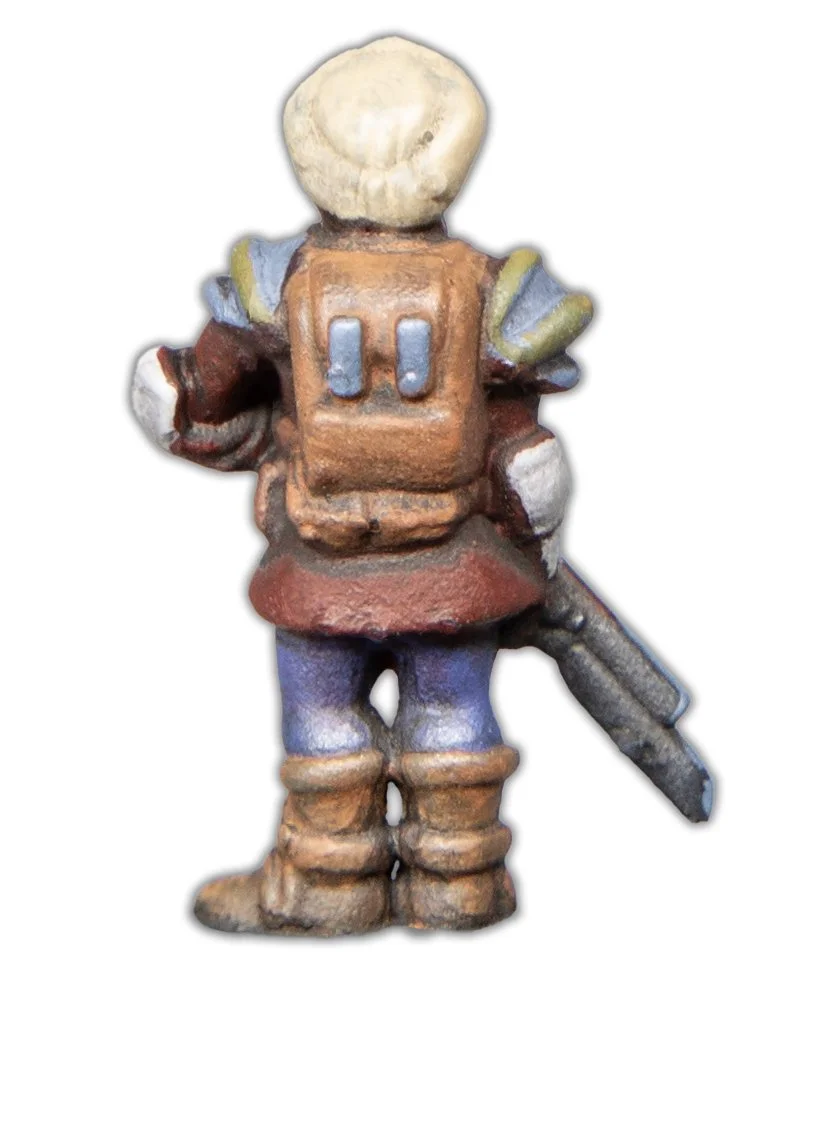
Crown Raj Infantry
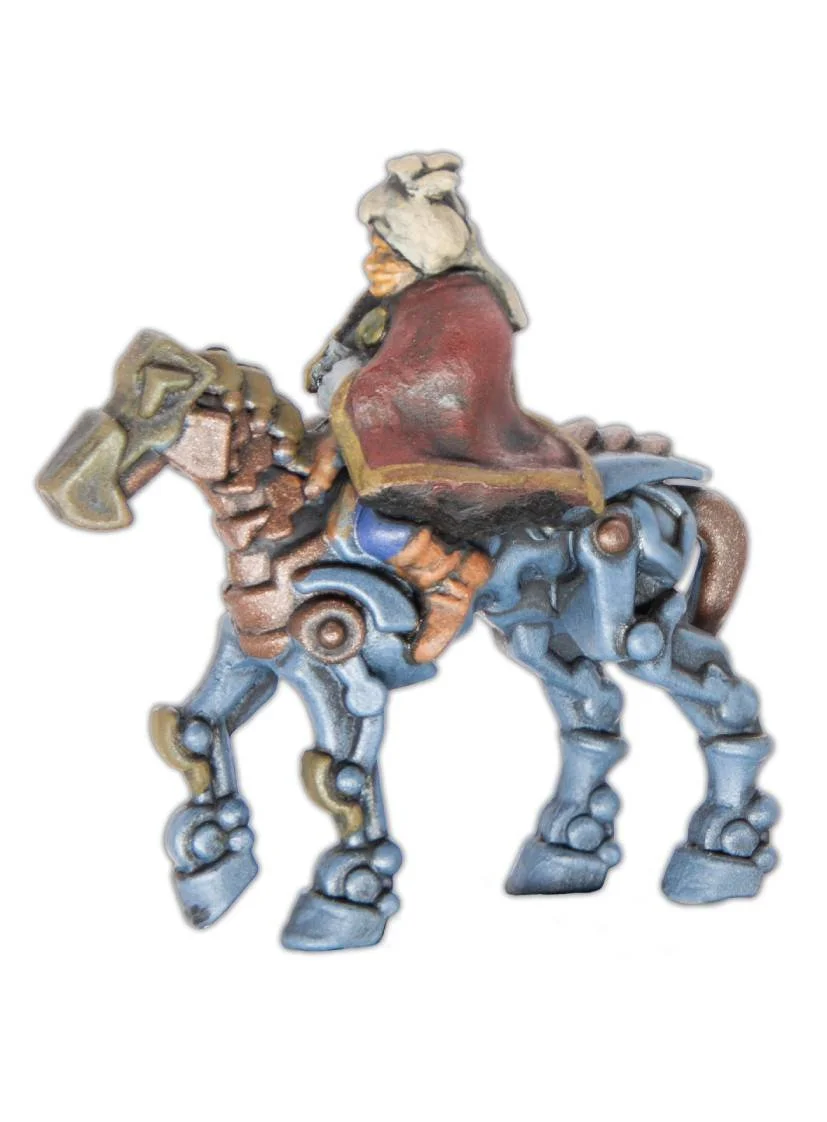
Crown Raj Cavalry
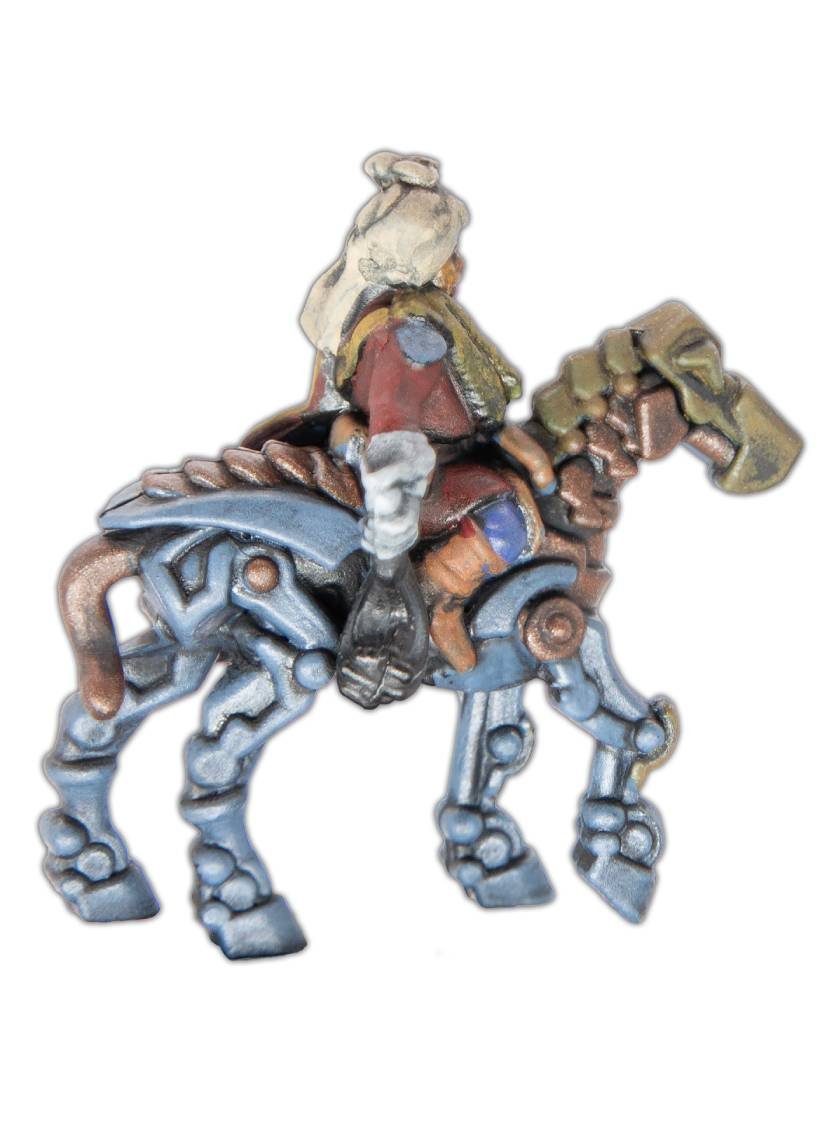
After the undercoat, I applied the following basecoats:
Jacket - Gory Red. Apply this in two to three thinned-down coats to get a homogeneous layer.
Trousers - Ultramarine Blue
Leather (boots, belt, pouches, backpack and elbow straps) - Grunge Brown
Straps, Gloves, Cuffs, Fasteners, Elbow Pads - Stonewall Grey
Skin - Parasite Brown
Turban - Khaki
Steel (shoulder pads, gun and buckles) - Sombre Grey
Gold (shoulder trims, horse head) - 1:1 mix of Golden Yellow/Charred Brown
Copper (horse neck and tail) - Hull Red
Step 3
Next, I applied a wash to the entire model using a 1:1:1 mix of Charred Brown/Blue Ink/Water. Once dry, you could quite happily end the process here and call the miniatures tabletop-ready.
Step 4
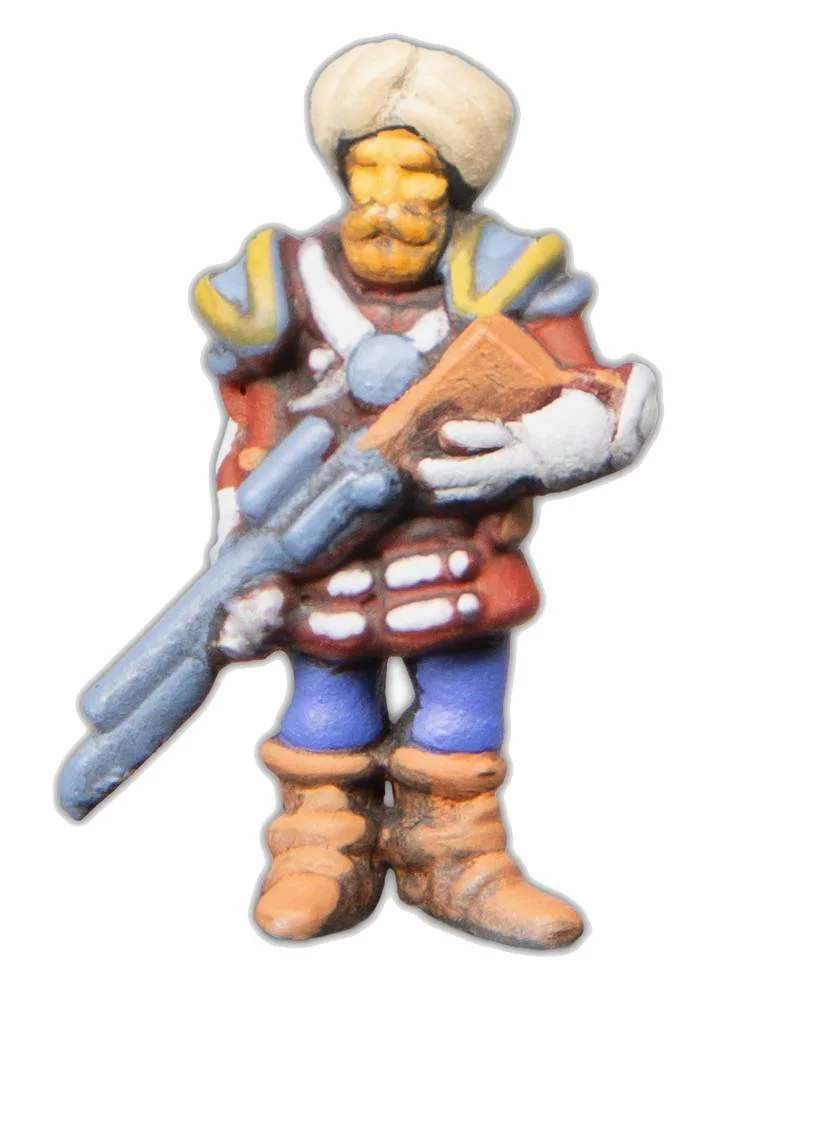
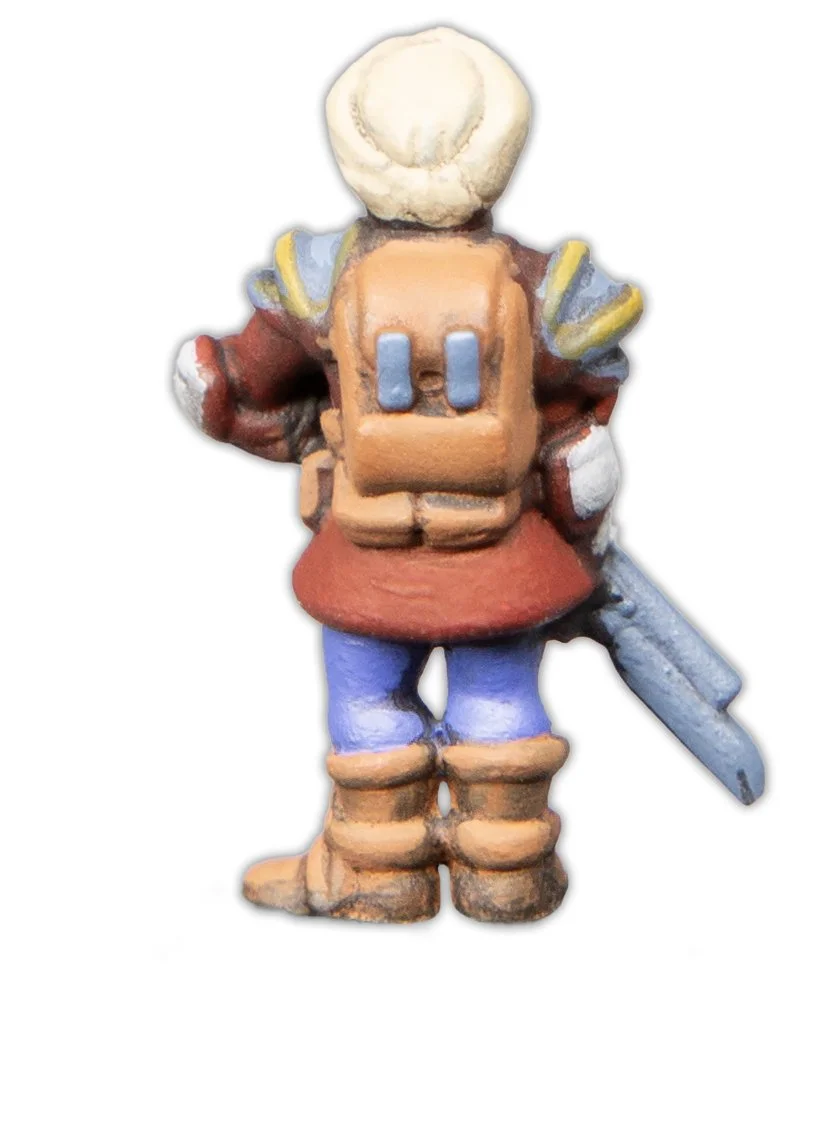
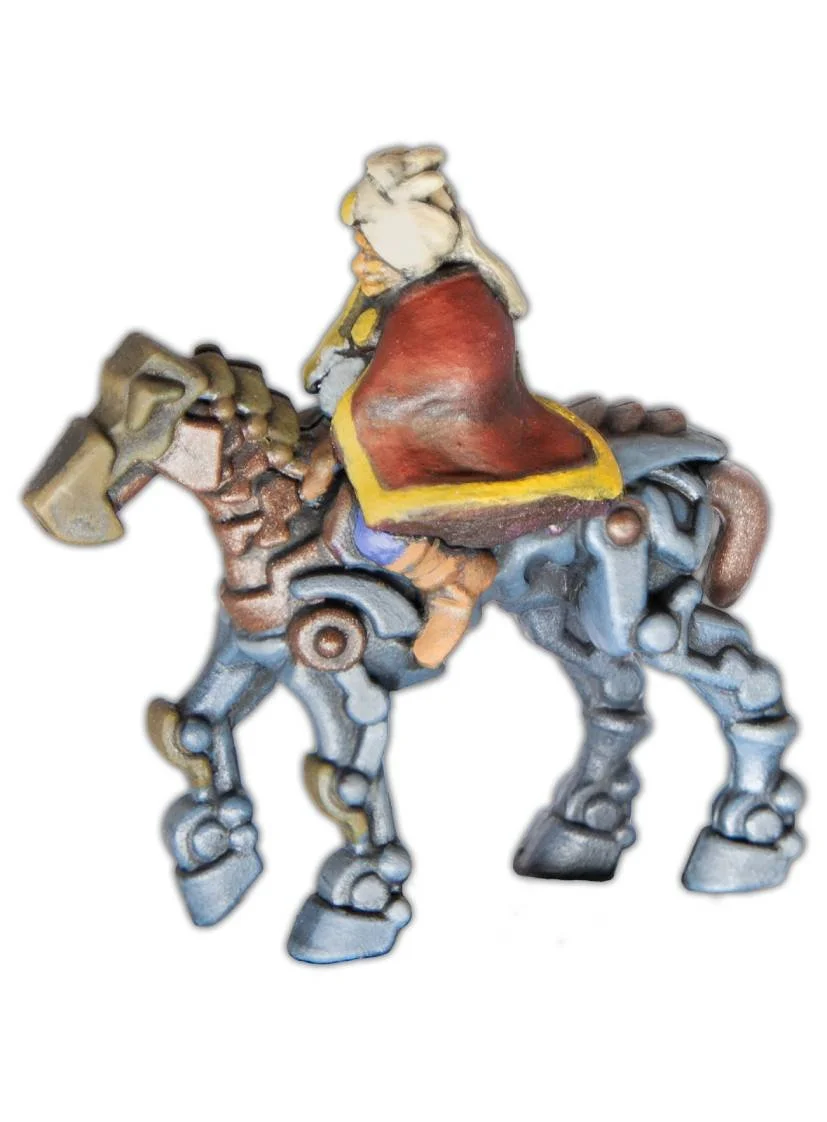
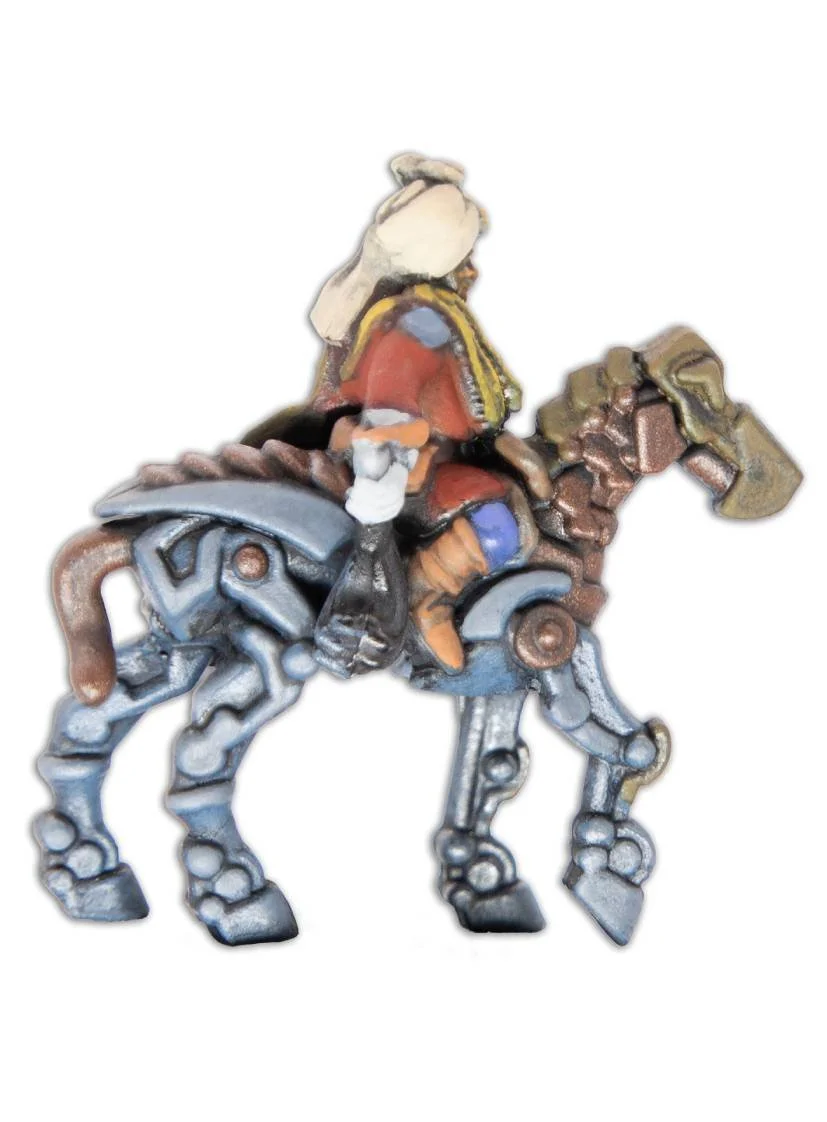
After the wash, I boosted the basecoats back up.
Jacket - Gory Red, feathered out from the deepest recesses.
Trousers - Ultramarine Blue, focusing on the upper volume of the knee
Leather - Grunge Brown, focusing in on upper volumes and edges
Straps, Gloves, Cuffs, Fasteners, Elbow Pads - Stonewall Grey, leaving the darker tone in the recesses and shadows
Skin - Parasite Brown applied to brow, nose and cheekbones
Turban - Khaki, feathered out across major folds and creases
Steel - Sombre Grey applied to upper volumes of metal areas as a chunky edge highlight
Gold - 1:1 mix of Charred Brown/Golden Yellow applied to upper edges
Copper - Grunge Brown applied as an edge highlight and to major volumes
Step 5
It’s time to begin the highlighting stage!
Jacket - 1:1 mix of Gory Red/Bloody Red across the main surface area.
Trousers - 3:1 mix of Ultramarine Blue/Pale Blue, focusing in further on the upper volume of the knee.
Leather - 1:1 mix of Grunge Brown/Sunset Orange, focusing on edges and the highest volumes.
Straps, Gloves, Cuffs, Fasteners, Elbow Pads - 1:1 mix of Stonewall Grey/Deck Tan applied to upper blocks, sharp edges, and fingers.
Skin - 1:1 mix of Parasite Brown/Sunset Orange applied to brow, nose, and cheekbones
Turban - 1:1 mix of Deck Tan/Khaki applied to highest volumes and sharp folds/edges
Steel - 1:1 mix of Sombre Grey/Pale Blue applied to upper edges and flat areas as a fine edge highlight
Gold - 3:1 mix of Charred Brown/Golden Yellow applied to upper edges inside previous highlight
Copper - 1:1 mix of Grunge Brown/ Parasite Brown applied as an edge highlight and to major volumes
Step 6
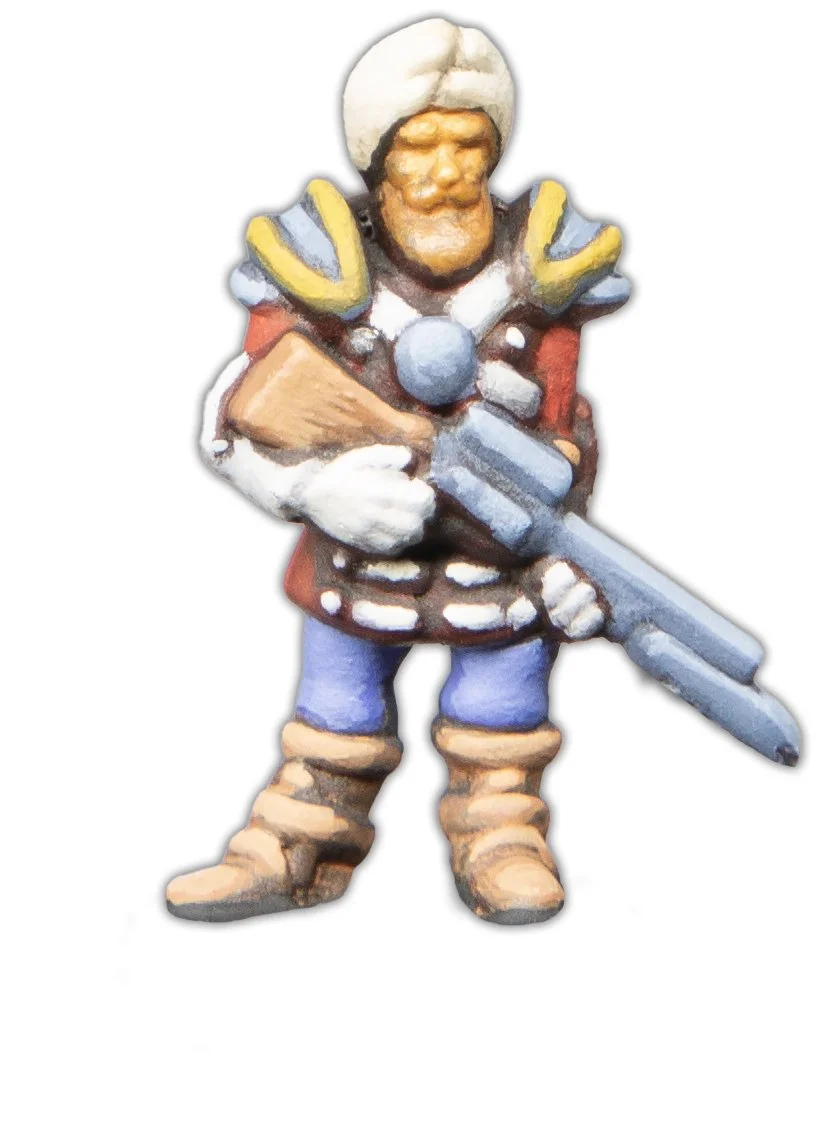
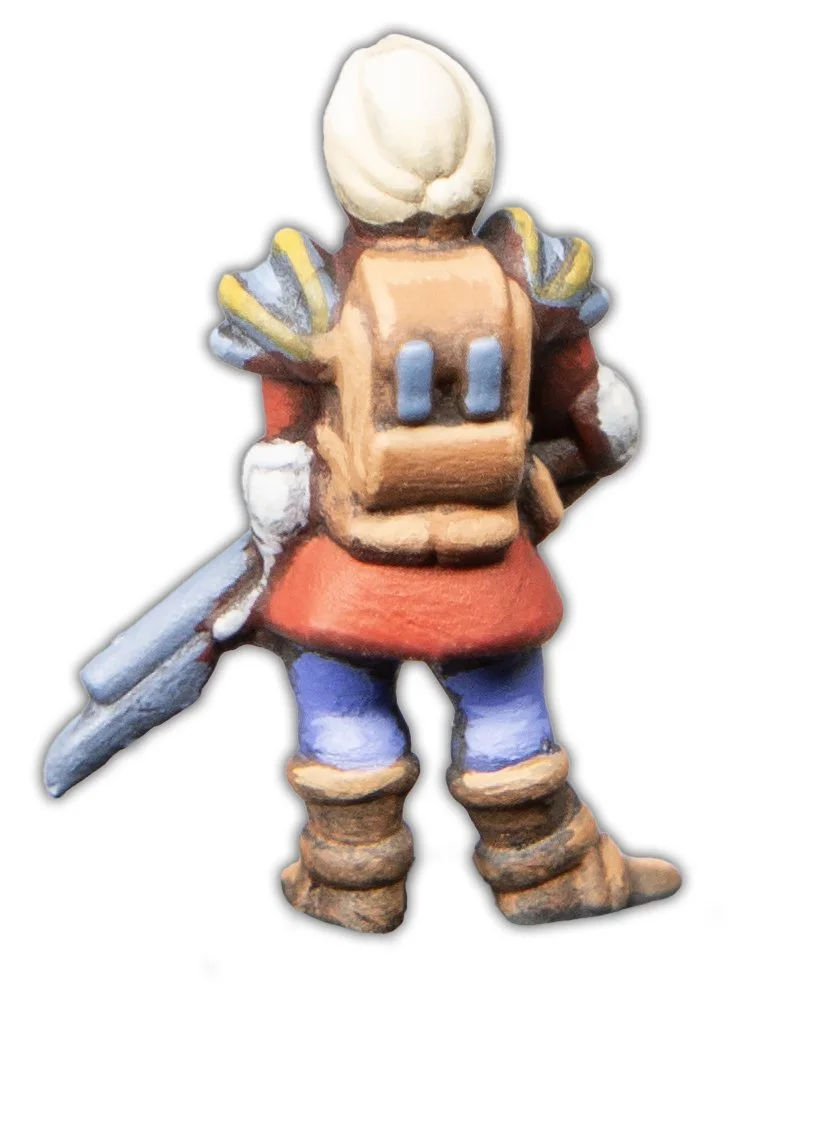
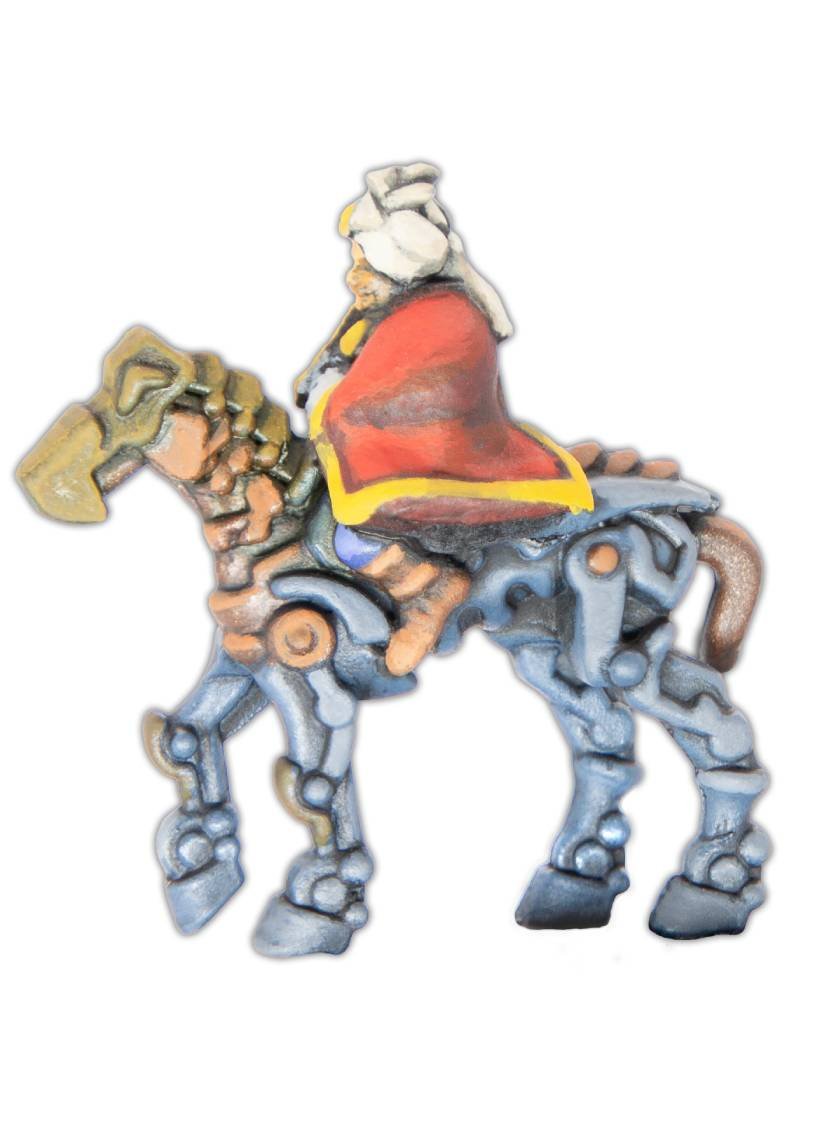
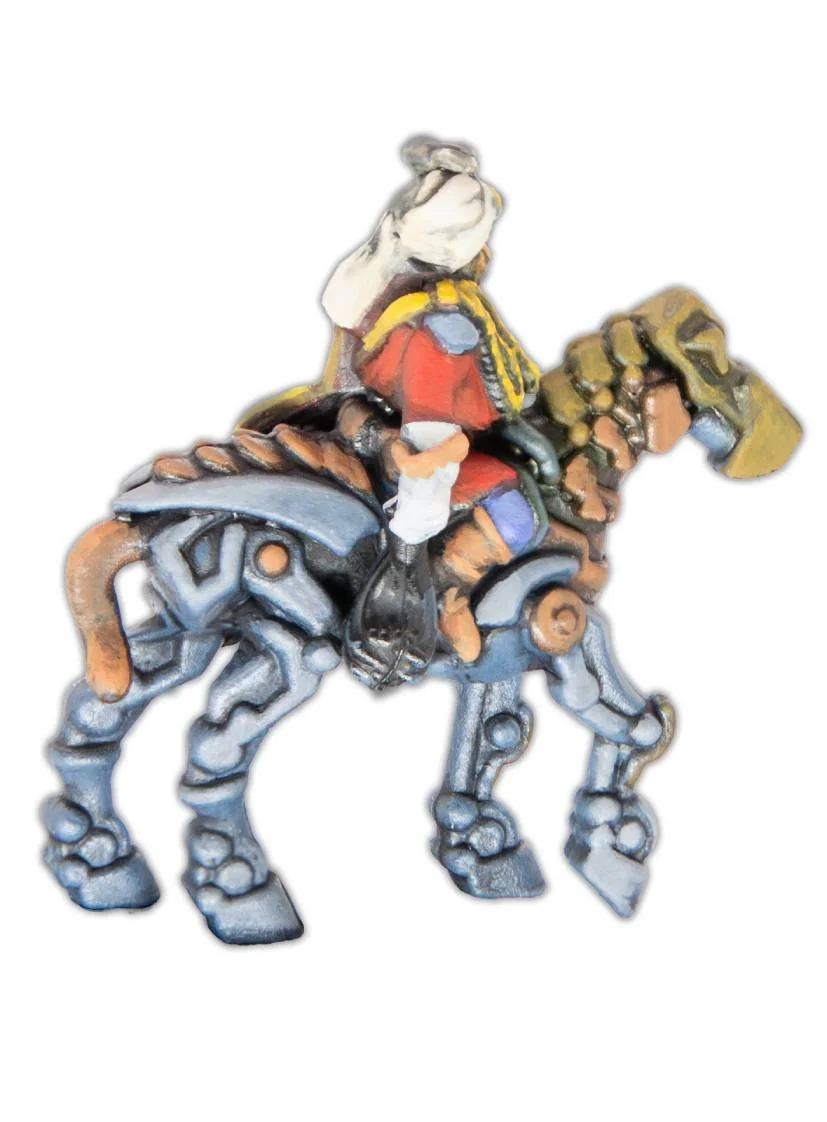
Time to finish up the highlighting.
Jacket - Bloody Red across the main surface area, ending your passes on the hard edge.
Trousers - 1:1 mix of Ultramarine Blue/Pale Blue, focusing in on the highest point of the knee.
Leather - 1:3 mix of Grunge Brown/Sunset Orange, focusing on neat edge highlights and upper volumes
Straps, Gloves, Cuffs, Fasteners, Elbow Pads - 1:3 mix of Stonewall Grey/Deck Tan applied to sharp edges and fingers.
Skin - Apply a thin wash 1:1 mix of Skin Wash/Water
Turban - 3:1 mix of Deck Tan/Khaki applied to sharp folds/edges
Steel - 3:1 mix of Sombre Grey/Pale Blue applied to upper edges as a fine edge highlight
Gold - Golden Yellow applied to upper edges inside previous highlight
Copper - 1:1:2 mix of Grunge Brown/ Parasite Brown/Deck Tan applied as an edge highlight
Step 7
The finishing touches!
Jacket - 1:1 mix of Bloody Red/Sunset Orange applied as an ultra-fine edge highlight to add separation between different elements.
Trousers - Ultramarine Blue glazed back into lower areas of the trousers to add further separation from the boots.
Leather - 1:1 mix of Charred Brown/Grunge Brown glaze applied to shade lower areas and add separation.
Straps, Gloves, Cuffs, Fasteners, Elbow Pads - final specular highlights of Deck Tan where necessary.
Skin - Highlight brow, nose and cheekbones with Sunset Orange
Turban - highlight final edges and details with Deck Tan
Steel - Use Pale Blue for a final edge highlight. Keep this focused to sharp edges and use specular highlights to add visual interest.
Gold - 3:1 mix of Golden Yellow/Deck Tan applied as a final specular highlight.
Copper - 1:1 mix of Grunge Brown/Deck Tan applied as a sharp edge highlight
Step 8
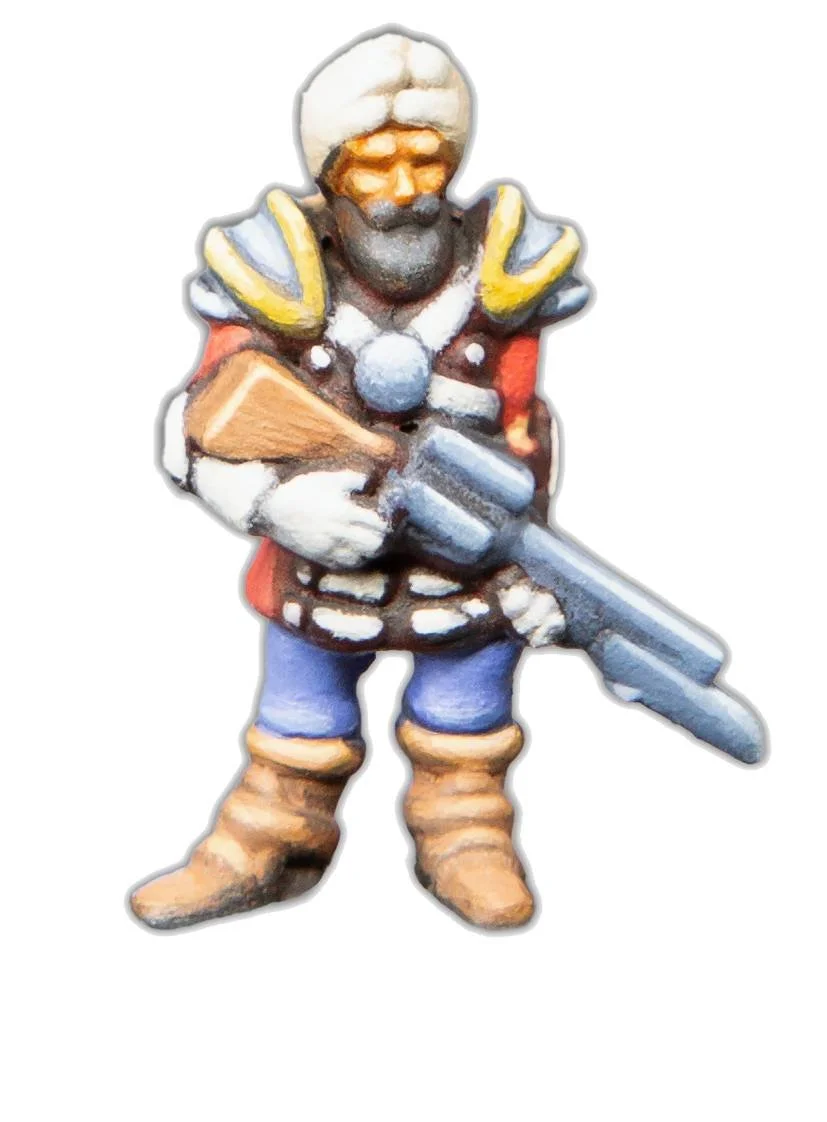
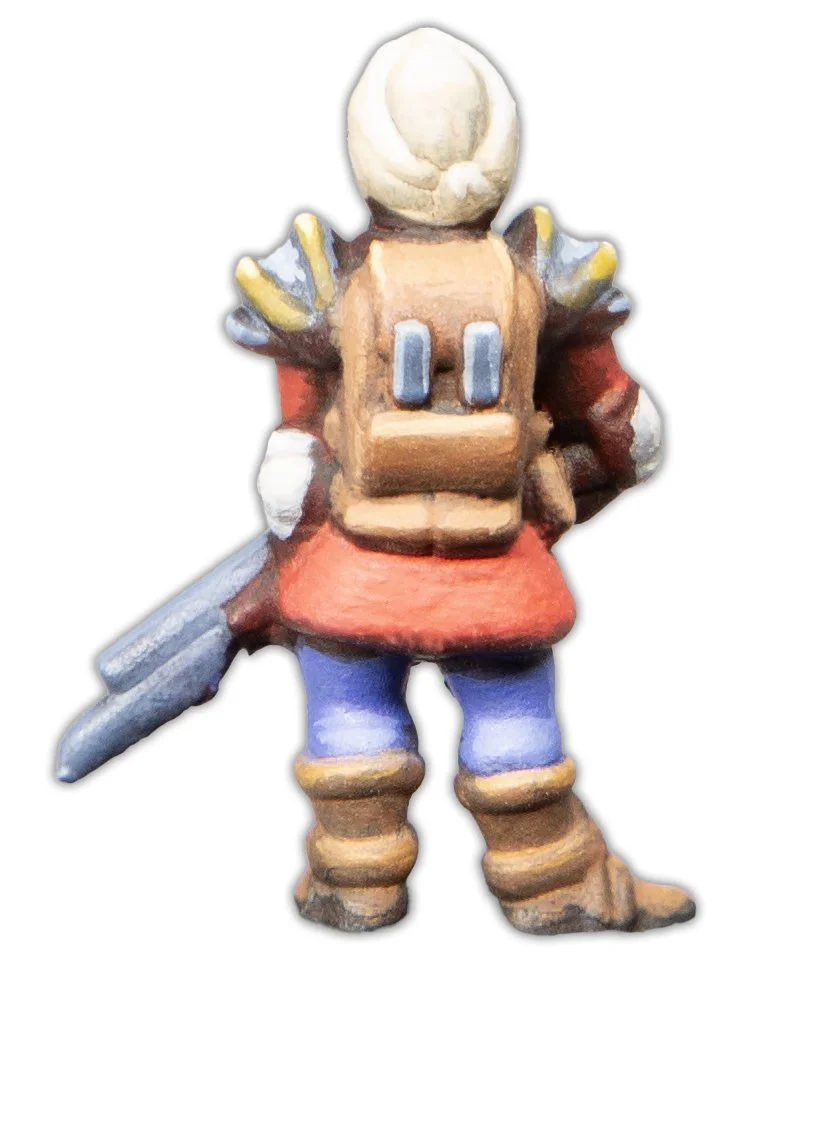
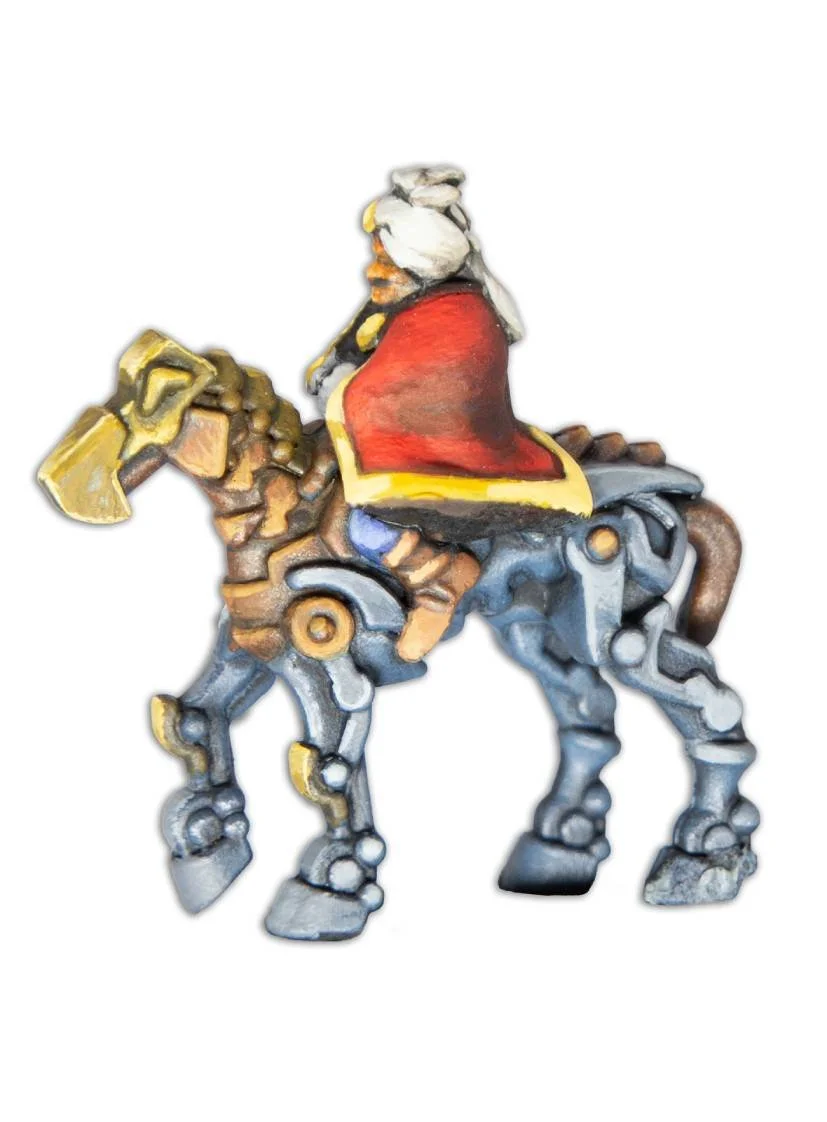
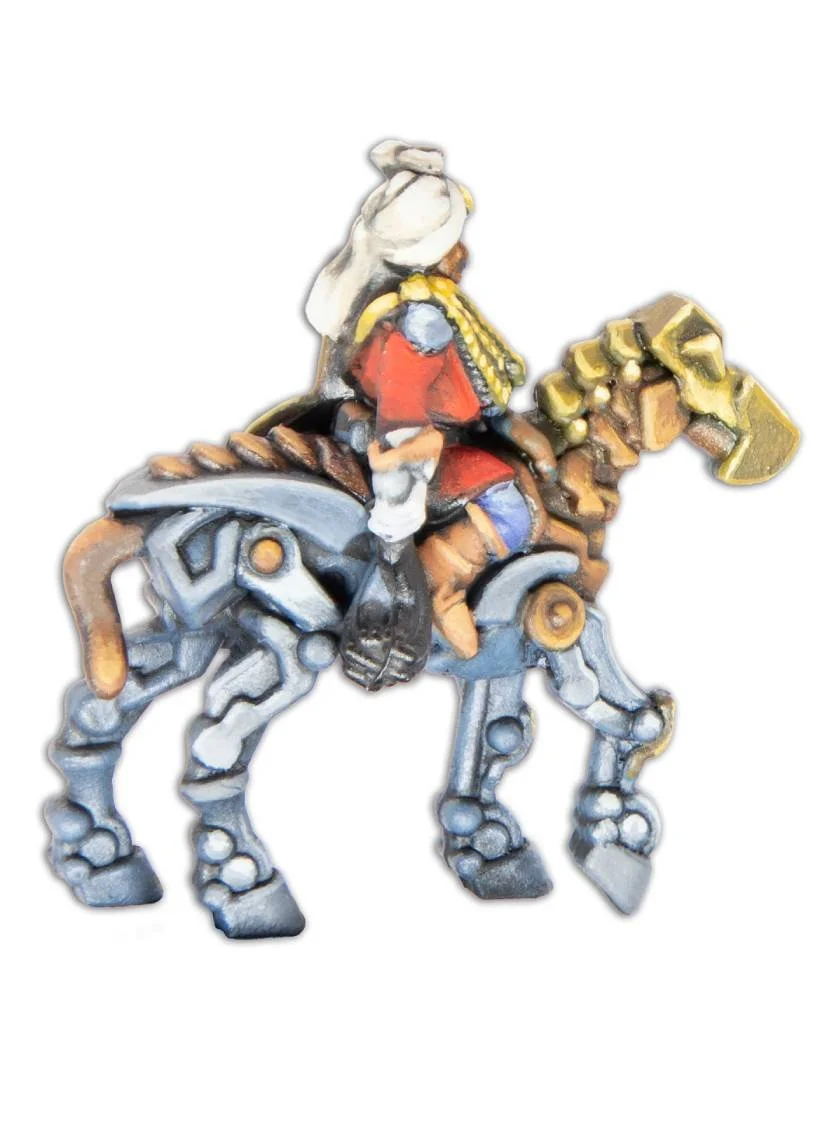
Step 8 - I painted the beard black and then highlighted it with a 1:1 mix of Black/Pale Blue, and we’re done!
And there you have it, whether you’re looking to paint your Crown Raj to a tabletop level, take your miniature painting to the next level, or simply looking for advice on a certain aspect of the miniature - we hope this blog has helped showcase how to get your Armoured Clash miniatures looking their best.
Make sure to stay tuned for the latest news on our Facebook, Instagram, and X and the Warcradle Studios Discord.